Carrot Cake Anyone?

Well, unless you have been sleeping under a rock the last few days, you will know that my Lil Man’s birthday was a few days ago, and he wasn’t with us.  Well, it’s been a few years since I actually baked a cake for him, as time has often been short, but this year, I wanted to do the right thing… and what did he want? No Spidey cakes or Starwars cakes for him this time. Rather a grown up Carrot cake was what he requested!

This is a pretty good recipe that I had found in a newspaper, and had made a few years ago, for my sister-in-law’s birthday initially. It is actually for a 3-tier cake, but that was huge!

This time, I still made the  3 tiers, but used 2 for his cake, and iced the third single one to take into work for my team!

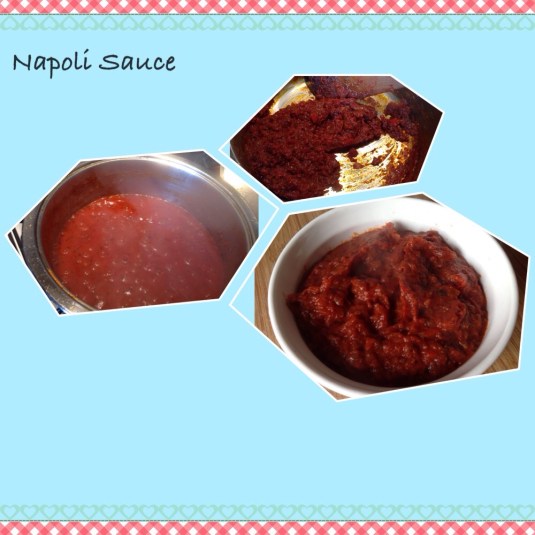
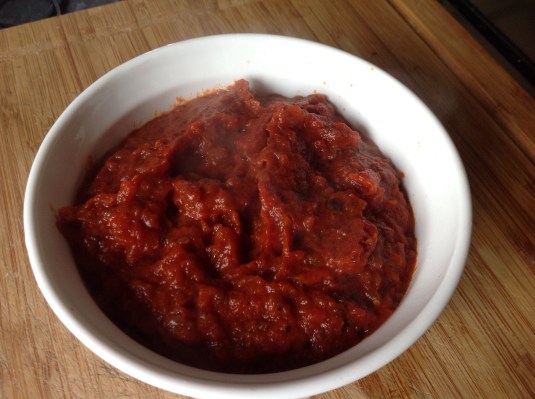
Here are a couple of photos of the 3 tier version (apologies, the photos were a bit rubbish!) and the single one from this time round!

Now, I would be cruel if I left you with drool hanging, and didn’t share the recipe.. I am not that awful, so here it is!

The Best Carrot Cake Ever!

Ingredients

525ml vegetable oil
9 eggs
525g soft dark brown sugar
420g grated carrots
Grated zest of 3 large oranges
525g self-raising flour
Pinch of salt
1tbsp bicarbonate of soda
1 ½ tbsp. mixed spice
Seeds of one vanilla pod
2 drops vanilla extract
200g icing sugar
40g butter, cubed
Finely grated zest of 1 lemon
115g low fat cream cheese, chilled
Handful of pecans or walnuts, toasted to decorate

Equipment

3 x 9inch round baking tins

Method

  1. Preheat oven to 180 degrees Celsius/350 degrees Fahrenheit/Gas Mark 4.
  2. Prepare tins by oiling the insides and lining with baking paper.
  3. Put the oil, eggs, sugar, grated carrots and orange zest into a large bowl and mix with a wooden spoon. The mixture is a lot, you may need to do this in batches.
  4. Mix the flour, salt, bicarbonate of soda and mixed spice, then sift into the bowl.
  5. Add the vanilla seeds and lightly mix everything together until the mixture is uniform, but still soft and runny.
  6. Ladle into tins and bake for 40-45 minutes.
  7. The cakes are ready when the sponge springs back up if pushed lightly. A skewer inserted into the middle should come out clean.
  8. Leave to cool for 5 minutes then turn out onto a wire rack, and peel off the baking paper.

For the cream cheese frosting

  1. Mix the icing sugar, butter, lemon zest and vanilla extract in a bowl then whisk well.
  2. Stir in the cream cheese. If the mixture looks runny then put in the fridge for 10 minutes to harden.
  3. When the cakes are cool, take two of them and slice off the domed tops, leaving them flat. Don’t slice the top off the third cake.
  4. Put a dollop of frosting in the middle of a serving plate to stop the cake from sliding.
  5. Take one of the flattened cakes and place it on top. Then pop a big spoonful of frosting and spread it all over, leaving a 2.5cm/1inch gap around the edge.
  6. Place the second flattened cake on top, then repeat.
  7. Put the unsliced cake on top then spread the frosting and decorate.
  8. ENJOY!!!

It was delicious, moist and carroty, with a hint of spice to warm things up! I definitely recommend it! If you get a chance, make it, and let me know what you think!

Shahi Paneer – Fit For A King

One of the numerous benefits of going home to visit my folks is the chance to eat my mum’s wonderful food.  She is  a great cook. And I know most people think that of their mum’s cooking, but my mum seriously is an amazing cook!

Our plan nowadays involves me watching her make certain dishes, at least one every visit, and writing the recipes down, because, as she likes to remind me, “not in a morbid way or anything”, she won’t be around forever!

This time, I requested a particular dish for Hubby Dearest, who is home alone, pining for us.  He often craves for a dish called Shahi Paneer. Shahi is the word associated with the royalty, so it is essentially quite a rich, sumptuous curry with paneer, which is Indian cheese.

Mum had planned to make it for me take home anyway, but the cooking process became a full on tutorial, and I thought I would be a good member of the Blogily, and share the processes.

Please forgive me, but there are no amounts for the ingredients, as my mum uses andaaza. This basically is when you just know! It’s a skill I think many mothers hone over the years while cooking the family favourite dishes!

So here goes…

Ingredients

2016-03-31_13.02.28.jpg

Some of the ingredients


Paneer, cubed
Onions, ground to a paste
Cumin seeds
Fresh tomatoes
Tinned chopped tomatoes
Turmeric
Salt
Pepper
Garam masala
Kasoori methi
Milk
Single cream
Cashew nuts
Coriander

Method

  • Add a little oil to a large saucepan and heat. Add cumin seeds and onions that have been ground to a paste. Cook on a low heat until the onions start to change colour, to a light golden brown.
  • Grind ginger, garlic and chillies and add to the onions, cooking for a few minutes.
  • Grind the fresh tomatoes, and blitz the chopped tinned tomatoes too. ( You gotta love the grinder!) Add these to the pan. Be generous with the tomatoes, they help to make a beautiful gravy for this dish.
  • At this point, add turmeric, salt, black pepper and garam masala, to taste.
  • This mixture needs to simmer gently until it begins to separate, and you see the oil rise to the top. Make sure the tomatoes are cooked well.
  • Take a handful of dried Kasoori methi in the palm of your hand and grind it to a sort of powder before adding to the pan. Another Mum tip: Griding the dried leaves with your hands actually releases the flavour better!
  • Time to prepare the cashews. Toast a handful of cashew nuts. Mum used the microwave for about 2 minutes… Who knew you could toast nuts in the microwave?!  Use a pestle and mortar, or that faithful grinder to grind the nuts then add them to the mixture.

2016-03-31_13.05.19.jpg

  • Using a hand blender blend the masala mixture in the pan. Shahi paneer requires a smooth sauce.
  • Add milk during the blending and, and some hot water.Give it a good whizz, then taste, and adjust seasoning if required.
  • Add the cream then cook on a low heat for a short while.

2016-03-31_13.08.26.jpg

  • Meanwhile, we need to get the paneer ready.
  • Cube the paneer, then lightly fry it until the colour starts to go golden brown. Drain the paneer and add it to the sauce.

2016-03-31_13.04.11.jpg

  • Allow to cook for a few moments then turn off the heat. Sprinkle fresh coriander over the top, and the dish is ready!

2016-03-31_13.10.20.jpg

Another mum tip, if you are eating straight away that is fine, but if you are planning on allowing it to cool for later, or freezing it, decant into a glass or earthenware container to cool.  She is convinced the tomatoes and cream could react to the pan metal.. though she isn’t sure!!!

Enjoy this dish with naan bread.

FIT FOR A KING!

Mum made a huge VAT of this for us, so I will be freezing some too!

Food Friday – See (sea) Food And Eat It!

image

Do you like prawns? I’m not a seafood fan, but hubby dearest loves it, so I try to make things he likes, but I won’t eat!
This one, such an easy dish!
Heat some butter in a pan, and add some garlic. Cook until it starts to brown. Then add some butterfly cut king prawns… Shelled thank you, I can’t cope with that shelling business!
Next a bit of salt n pepper seasoning and some dried chilli flakes to taste.
Add some chopped flat leaf parsley and a squirt of lemon juice, and it’s done!
Just like that!
He likes it served with a bit of toast!

image

But I Smile Anyway...

Foody Friday – Italiano!

image

If your kids are any thing like mine, then lumps and bumps of veggies in anything , get left on the plate at the end of a meal!
Well, for a change, the above dish went down a treat!
I blitzed onion, mushrooms, tomatoes and peppers in a blender, and added to some cooked, minced lamb. A little garlic ,  seasoning, and mixed herbs and voila! A secret veggie bolognaise sauce!
Mixed with pasta and topped with cheese…
Yum!
( now to work out how to disguise mince… Lil Princess ate it all and left some lumps of mince this time! “It was yummy, mummy,” she said, “but I left the brown bits!”)

But I Smile Anyway...

Napoli sauce!


It’s been a while now, a Hubby Dearest asks me to make a ciabbata sandwich with Chicken escalopes, some mushrooms, cheese and napoli sauce.

Napoli sauce? What is it? Never heard of it! So I have done some research, and basically it’s an Italian tomato sauce, pretty much like what I would make for a pizza topping, or basic pasta sauce. Anywho, I found a recipe  here and followed it, adding a little sugar as I didn’t get the ‘special tinned ones they recommended!

It’s simmering away as we type/read! 

…bubble bubble, toil and trouble…

Looking good so far! 

So what did I use?

Half a finely chopped onion

2 cloves minced garlic

1 tbspn red peppers finely chopped

1 veg stock cube

One 400g tin chopped tomatoes

Half tbspn tomato pure

Half tspn oregano, dried

Half tspn dried basil

Half tspn dried parsley

Pepper to season

1 tspn sugar

  1. Fry onions in a little olive oil til golden brown then add peppers and garlic
  2. Cook until you can smell the garlic
  3. Add the tomato purée and cook off for 1 minute
  4. Add everything else, stir and simmer on low heat for about 45 minutes
  5. Stir through half tbspn Olive oil and allow to cool
  6. Store, and enjoy whenever!

Cooked, reduced, cooling ready for jarring amd using whenever we want!

It looks good, and tasted pretty yum too! 

Ready to be stored for use whenever

Top with a little olive oil, store in the fridge and use within a month! 

I found it quite strong initially so I added another small can of tomatoes and there’s the new improved version!


And here’s the Chicken Escalope Ciabatta sandwich he was asking for, complete with mushrooms n cheese!
image

Previous Older Entries Next Newer Entries

My interactive peeps!

  • Unknown's avatar
  • Unknown's avatar
  • Unknown's avatar
  • Unknown's avatar
  • Unknown's avatar
  • Unknown's avatar
  • Unknown's avatar
  • Unknown's avatar
  • Unknown's avatar
  • Unknown's avatar
  • Unknown's avatar
  • Unknown's avatar
  • Unknown's avatar
  • Unknown's avatar
  • Unknown's avatar
  • Unknown's avatar
  • Unknown's avatar
  • Unknown's avatar
  • Unknown's avatar
  • Unknown's avatar
  • Unknown's avatar
  • Unknown's avatar
  • Unknown's avatar
  • Unknown's avatar
  • Unknown's avatar
  • Unknown's avatar
  • Unknown's avatar
  • Unknown's avatar
  • Unknown's avatar
  • Unknown's avatar
  • Unknown's avatar
  • Unknown's avatar
  • Unknown's avatar
  • Unknown's avatar
  • Unknown's avatar
  • Unknown's avatar
  • Unknown's avatar
  • Unknown's avatar
  • Unknown's avatar
  • Unknown's avatar
  • Unknown's avatar
  • Unknown's avatar
  • Unknown's avatar
  • Unknown's avatar
  • Unknown's avatar
  • Unknown's avatar
  • Unknown's avatar
  • Unknown's avatar
  • Unknown's avatar
  • Unknown's avatar